Blog 1: Laser Cutting
- dylanl21
- Nov 5, 2022
- 3 min read
In this page, I will describe:
1. The 4 important hazards associated to the operation of laser cutting machine
and their respective safety control measures (administrative/engineering
control).
2. The materials that can be cut and can’t be cut using laser cutting machine.
3. The steps including pictures on the operation of UNIVERSAL laser cutter, that
consist of:
a. Starting the compressor, turning on the laser cutter machine and fume extractor.
b. Importing a .DXF file to coreldraw and modify the lines/fill for cutting and engraving.
c. Sending the coreldraw drawing to laser cutter software and setting the laser cutter power, speed, PPI in the software.
d. Starting the job on the laser cutter machine.
e. DOs and DONTs when there’s flame/fire on the material being cut. 🔥
4. My learning reflection on the laser cutter activities
1. These are the 4 important hazards and the respective safety control measures on the operation of laser cutting machine:
Hazards | Safety Control Measures | Pictures to support the explanation |
Staring at the laser beam | Administrative: Students have been briefed to monitor the cut by glancing and not staring as it could cause eye damage. |  |
Accumulation of toxic gases that may cause flare up | Engineering: Fume extractor will suck out gases which are produced when laser cutting Administrative: Procedures require users to turn on fume extractor before cutting. Students are told to not use certain materials for laser cutting. |  |
Focus lens cracking | Administrative: Students are briefed to check the laser lens if operation of laser cutting is unsuccessful after 2 attempts |  |
Fire may break out | Engineering: The air assist will blow off any dust particles from the laser head to prevent them from catching fire. Administrative: Students are briefed on what to do when a fire occurs.
|  |
2. Below are the materials that can be cut/engraved using laser cutting machine in FabLab.
Material | Photo of Material |
Paper ( Art Card / Technical Board) |  |
Cardboard |  |
Wood (Plywood / Natural / MDF) |  |
Acrylic |  |
Below are the materials that can’t be cut/engraved using laser cutting machine in Fablab.
Material | Photo of Material |
PVC |  |
Metal |  |
Foam |  |
Rubber |  |
3. Below are the steps on the operation of UNIVERSAL laser cutter machine in FabLab:
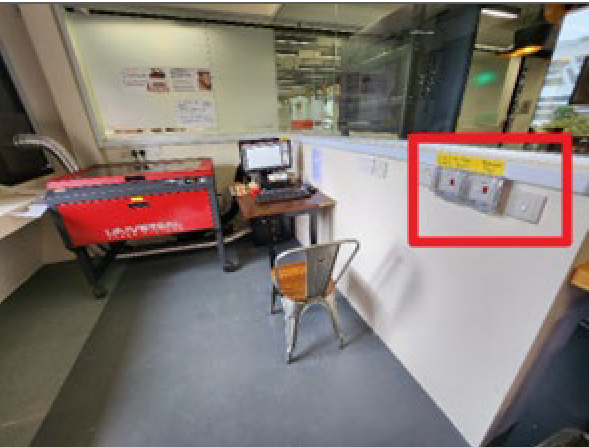
a. Starting the compressor, turning on the laser cutting machine and fume extractor
Steps and description | Photos to support the description |
|  |
b. Importing a .DXF file to coreldraw and modify the lines/fill for cutting and engraving.
Steps and description | Photos to support the description |
1. Select File > Import > Select your .DXF file and press import. |  |
2. Modify the lines / fill for cutting and engraving as desired. | |
2a. How to cut: Find a pen tool at the bottom right of the screen with a colored box beside it. Double click the box and a menu will appear. Change the line width to hair line. Change the color to RGB RED. R: 255 G: 0 B: 0 |    |
2b. How to engrave: Find a bucket tool at the bottom right of the screen with a colored box beside it. Double click the box and a menu will appear. Change the fill color to RGB GREEN. R: 0 G: 255 B: 0 |   |
c. Sending the coreldraw drawing to laser cutter software and setting the laser cutter power, speed, PPI in the software.
Steps and description | Photos to support the description |
1. Click on File > Print |  |
2. A menu will appear. Click on the Cogwheel for settings. |  |
3. Universal’s Material setting will appear. Click on LOAD for more material settings. |  |
4. Select the presets that matches your material type and thickness and select OPEN. |  |
5. Click OK on the Universal’s Material setting. |  |
6. Click print on the print menu. |  |
d. Starting the job on the laser cutter machine
Steps and description | Photos to support the description |
1. Click on the UCP (Universal Control Panel) icon at the taskbar. |  |
2. Activate the laser cutter by pressing the red button at the top right. |  |
3. Use the focus function to check if material is within the safe cutting area. If not, use the 'to pointer' button to move your file to a suitable area. |  |
4. Close the lid of the laser cutter gently. | |
5. Press the play button on the UCP. |  |
e. DOs and DONTs when there’s flame/fire on the material being cut. 🔥
DOs and DONTs | Photos to support the description |
DOs
| |
DONTs
| |
4. Below is my Learning Reflection on the laser cutter activities. This was my first time using a laser cutter and I was worried when I learned that we had to make a SOP beforehand and refer to it during the laser cutting competency test. Luckily, the CPDD module in brightspace provided a video and guide for us to refer to when making our SOP. I knew that some of my classmates were confused between engraving and scoring. I, on the other hand, was not as confused as my classmates as I own a scoring knife so I knew that scoring was related to lines and thus had an easier time differentiating between scoring and engraving.
On the day of the actual laser cutting test, our examiner gave a group of my classmates including me a quick run-through on the laser cutter. He would also ask us questions to test us to see if we knew what to do. During this process, I realised the brightspace resources had missing information. For example, the guide did not mention when to press print on the print menu after settling the material settings.
Afterwards, we had to do our individual tests for laser cutting. Even with the SOP I made and printed, I still was not confident as it was my first time handling a laser cutter which led to the examiner to give me a few prompts for me to continue. After the test was done, I realised that I was also reluctant to use my SOP during the test itself since I wanted to see how much of the steps I knew clearly in my mind. I referred to the SOP mostly at steps involving UCP, which suggested that I knew what to do for coreldraw and the material setting. Even though I passed the competency test, I am still not confident with operating a laser cutter. I would still be able to bring my SOP when doing so but I would like to be more confident in knowing the procedure which would come with experience.
I am not sure when I will use a laser cutter again but this has been a fun and new experience.
Comments